I101: Introduction to Informatics
Lab 3 - Advanced HTML: Cascading Style Sheets
Detailed Instructions for Tasks
Introduction
Cascading Style Sheets (CSS) is a means of better controlling the presentation aspect of HTML. It's also widely used with XML and XHTML since those technologies are about content and really aren't about presentation. Getting to know this language is a great help for people interested in developing for the web - it can make your life much easier and give you a lot more control over how your content is displayed. The basic idea behind CSS is to create 'rules' that are used to display content. These rules are either triggered by the HTML tags you already know, e.g. <p> or tags you create yourself. A rule is a means of changing or adding or removing a particular value to a tag. This lab introduces CSS through a series of examples. The nice thing about CSS is that the basics are pretty small--you can learn most of it in a day. We're only going to look at a portion of it today.
1 Introduce Style in HTML
Create a page with the following HTML

When you've finished display the page. You should have something like this:

HTML allows you to modify tags and change the way the page looks rather easily. However, there is a penalty you pay for this ability: the presentation (the way the page is displayed) is mixed in with the content. And so, when people search your pages, they must also search through your presentation--presumably that's something nobody wants. Another reason to keep your display information separate from your content is that your page might look great on a flat screen monitor, but look horrible on a web-enabled cell phone, PDA, kiosk, or other device. If you separate your display from your presentation you can simply link a different set of display rules to allow other devices to see your page like you want. Further, if you like this style you've just created and want to use it again you have to repeat the style in its entirety in your HTML. For example,
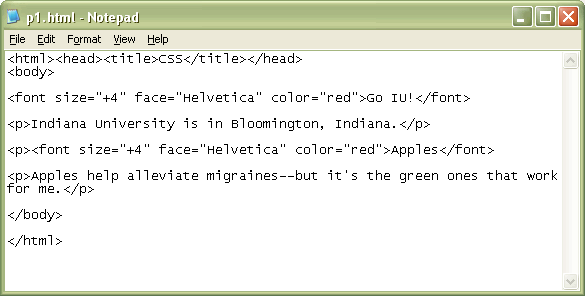
which displays as
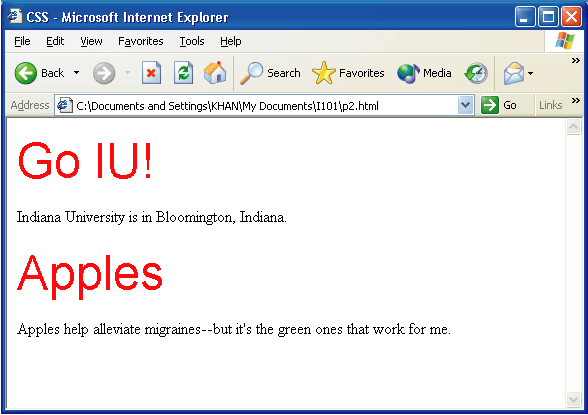
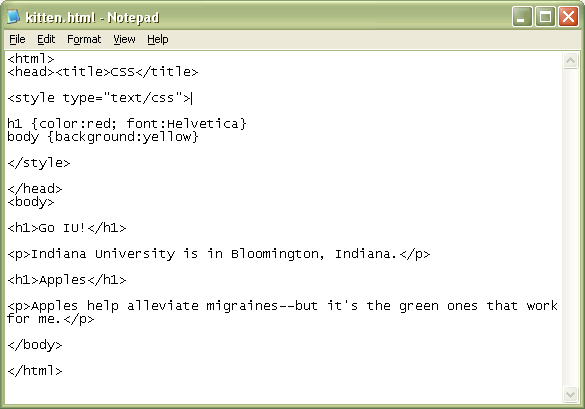
Suppose you like this so much you want the H1 to be red and Helvetica type. This can be achieved using CSS.
Create a new web page named kitten.html with the following HTML
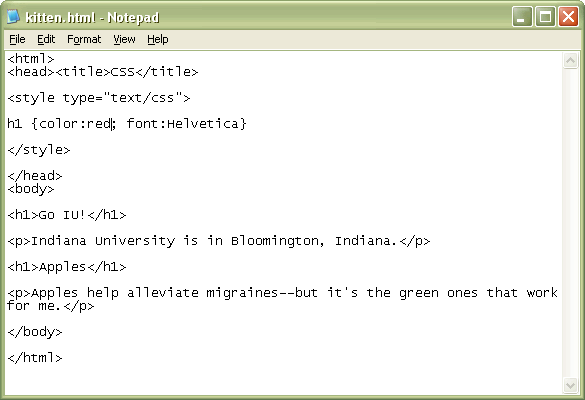
Your page should look like this once it's displayed:
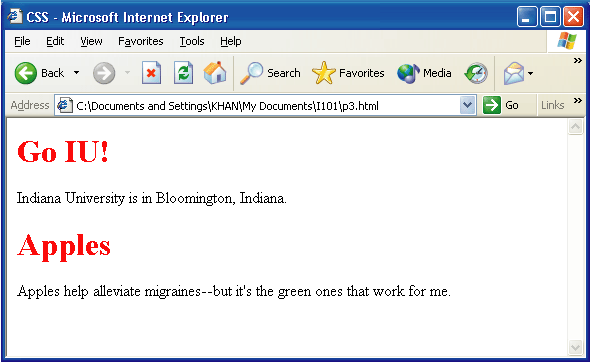
Note: Sometimes the font you want will not be displayed as you intended--this has to do with the user's browser and settings. Let's look at the new style section that can placed in the <head></head> of your HTML page:
<style type="text/css">
</style>
This is a means of adding "style" (no pun intended) to your document. The style tag must always use the attribute type. The value is
"text/css". This tells the browser to read a css in a text format. The style information contained in this section is called the document style sheet. The document style sheet is a collection of rules. For example,
h1 {color:red; font: Helvetica}
is a
rule. The rule applies to all <h1> tags. We'll learn more about how to create rules presently. For now let's add this
rule inside the <style> tags:
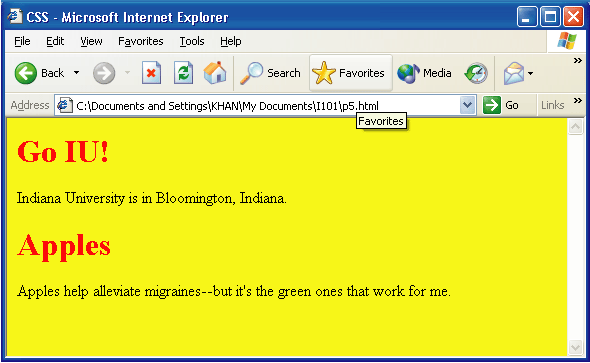
body {background:yellow}.
Can you guess what the page will
look like if you add this to the style sheet? Add this rule and see what
happens.
The page should look like this:
Because you're likely to use styles in many different documents, there's a <link> tag that lets you reference an external style sheet. Using such an external style sheet is usually a great idea because you can place all of your display rules in one place and have all of your pages use those rules. This makes changing the way your web pages display a snap - all you have to do is change the rules in your external style sheet and all of your pages will change to match. Let's see how this works.
For this, edit your last web page to look like this:
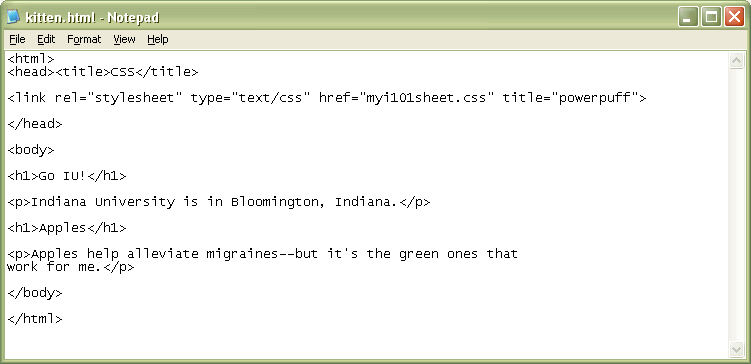
Notice that we've removed the style tags, but added a link tag. The <link> tag allows you to reference another document--in this case, a style sheet. You have to be careful about where you place the link tag. It must be placed at the beginning of the document inside the head tags. The link attributes are rel for relation--the kind of relationship, presumably, the link has. The type is "text/css" like before. href indicates the location and name of the style sheet. You probably remember this attribute from the <a> tag we use to create links. So, the href in this case works the same way. It tells the html where to find the .css file
Now we need to create that css file. Create another document that contains just rules--no HTML This file is named myi101sheet.css. It's in the same directory as the HTML document, so it doesn't need a full URL. Make sure it's in the same directory as kitten.html

Save both files and make sure the document looks the same when it's displayed. Open your kitten.html and make sure it has a yellow background and some red text.

There's yet another way to include style information. This is via the import directive. Suppose you want the <h2> tag to be white text on a black background and you have a file called another.css that contains this rule:

To include this to your document, in addition to your link, you use @import url(<the url of the style sheet>). This is the entire page:
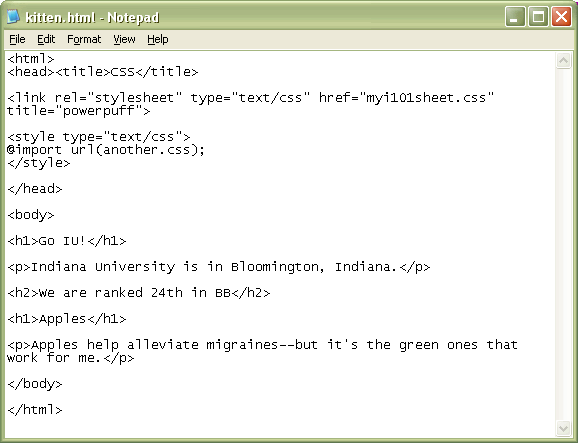
Create the style sheet another.css and add the import directive. Your page should look like this:
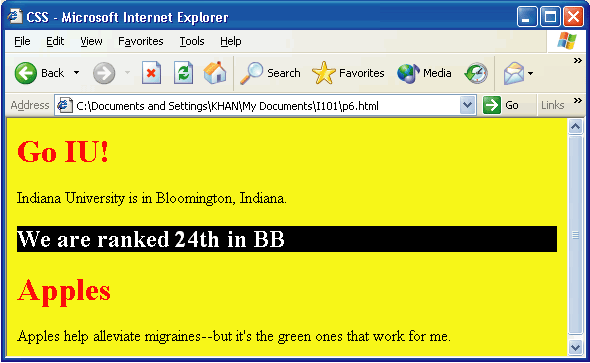
If you've made a mistake--for instance not including the semicolons, your page will not display properly.
2. A Closer Look at CSS Rules
A rule in CSS is made up from a selector--generally some tag--and one or more declarations--a modification of a tag's value.
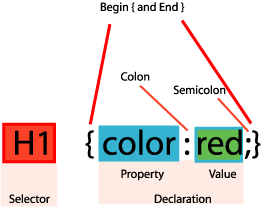
In the HTML above, the tag we're interested in modifying is the header tag H1. The declaration(s) are contained within { }. The declaration
itself is a property of the selector tag, a colon, the new value we want the property to have, then a semicolon. If you forget the semicolon,
spooky and scary things happen. It's easy to forget a lonely semicolon. Just be vigilant. As you might have observed, a selector can have multiple
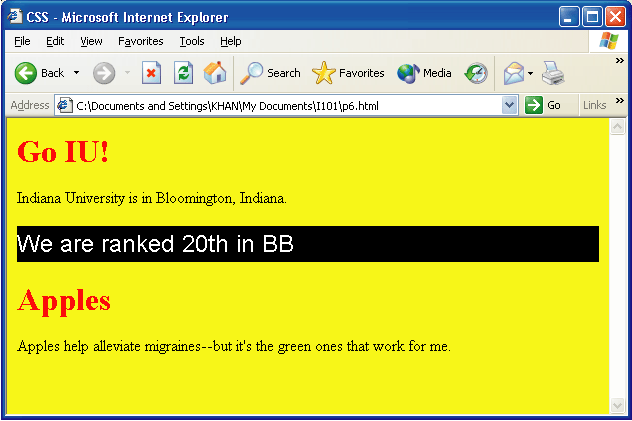
declarations--we need to separate them with spaces. Rules can modify practically any HTML or XHTML element, so we could just as easily modify the borders of a table or the background color of a table data element as we can the space between list items or the color and font of text. Generally, values of proprties are single words, but sometimes they can be a collection of values. Observe this by changing the file another.css to have the rule:
h2
{color:white; background:black; font: large/150% sans-serif}
You should see this:
Suppose you really love the color red! You'd like to have both h1 and h2 be red. You already know a couple of ways to include this style--but an easier way exists since the declaration is the same:
h1, h2 {color: red;}
The two tags are separated by a comma so you can apply a style to more than one tag at a time.
Turn in this file along with the corresponding CSS file(s).
Create a web page called puppy.html as shown below:
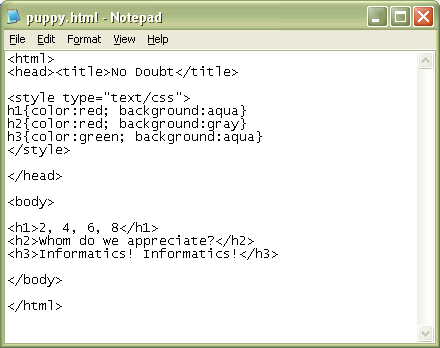
This page will display like this:

Using what you have just learned, create two new style sheets different from the one shown that displays the page exactly the same. Turn in this file along with the corresponding CSS file(S). This means that you need to use @import and have a stylesheet linked like we did with kitten.html.
3. More on Selectors
In addition to the selectors we've seen--essentially tags--CSS offers two other kinds: ID and class selectors. Basically these selectors allow
you to affect only some of the elements in the document, rather than all of the elements in the entire document. For example, you want people to be able
to
tell the
difference between a task they need to do and simply background information--both
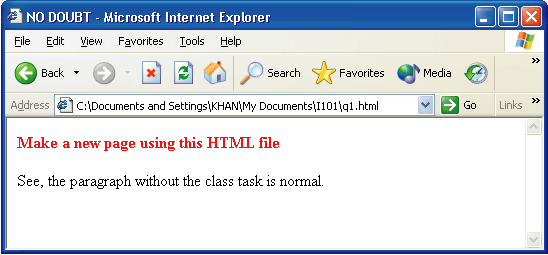
in the same document--much like this one. In this document, the red bold text is what you do, the black normal text is background. I can't
just create a rule like this: p {font-weight : bold; color : red;}, because every paragraph would have red text. So, I can create "my own" class tag. Here's my new document with a class selector "task". I created it myself.
Create this web page yourself too:
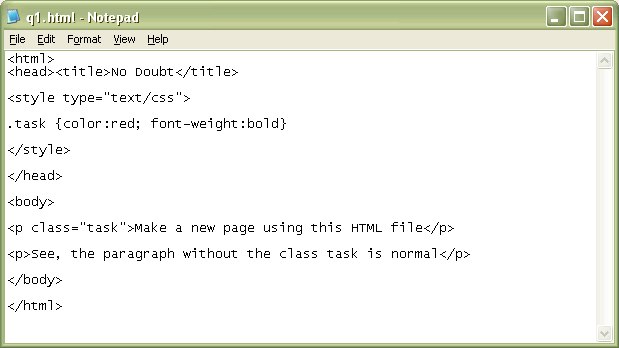
Notice that when we want the text to be red and bold (for when someone is supposed to follow directions), we use the new class task. The period is required. Here's what your page should look like:
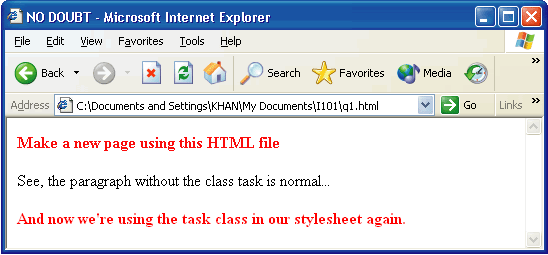
If we simply want a portion of text to use that class that isn't contained in a presentation tag, we can use the span tag. Modify your web page so it looks like this:
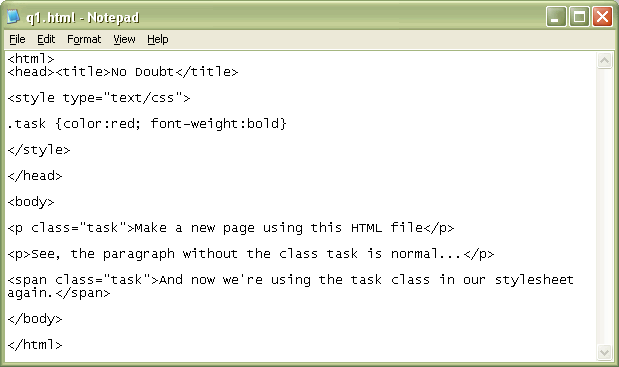
Can you predict what your page will look like? It should look like this:
We can actually add the class to the selector to make a special <p> (paragraph) tag. Observe the style portion:
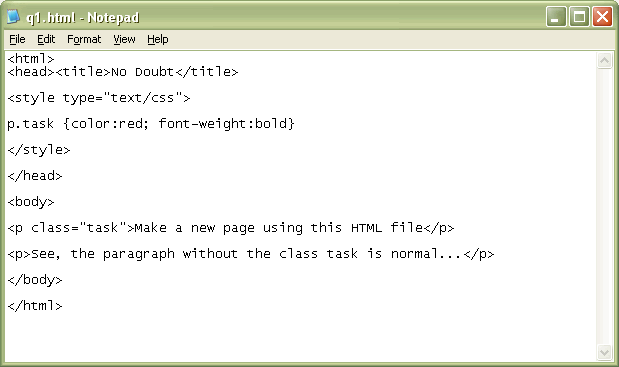
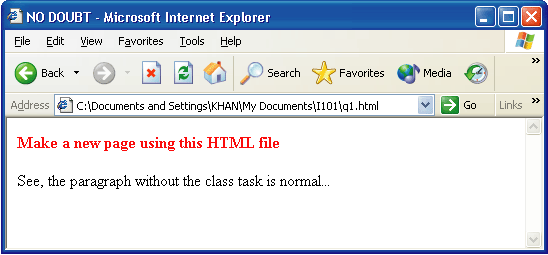
We've added a class to the paragraph tag. So that class can only be applied to <p> tags. The page should look like this:
ID selectors are like Class selectors except meaner. They overwrite other styles. IDs are names you assign to elements, but you use a # instead of a .
Do this example:
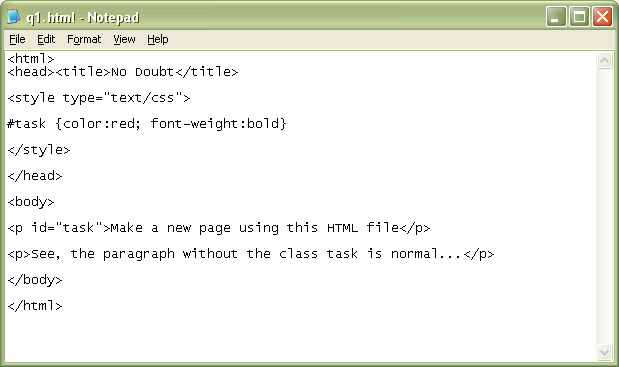
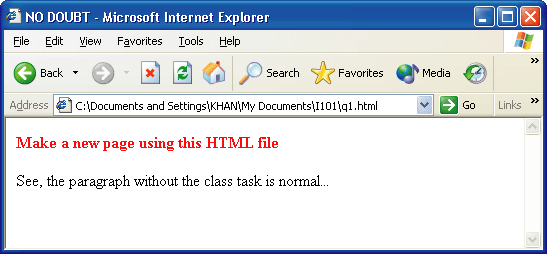
Observe the ID selector. I've called it task. To invoke this style, we use it as a value for the ID attribute. Here's your page:
4 Pseudopods, classes, and elements
Sometimes we'd like to change properties of tags that aren't actually style elements, but operations--like links. In this lab, we'll look only at pseudoclasses (and skip elements). As an example, create the following web page named zippy.html, then click the first hyperlink. Then return back to the original page by clicking the back button.
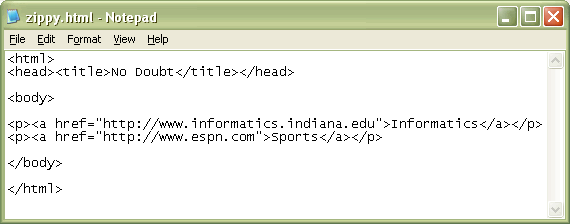
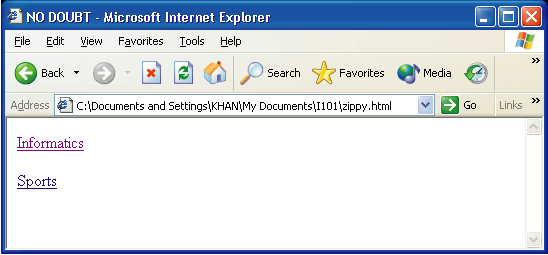
My page has unvisited links as blue, and visited links as purple. Observe what your links are. In addition, the links are underlined.
Copy (I know, you have to type it) the following style to your page:
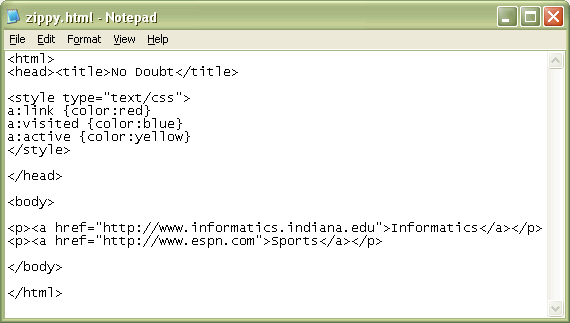
Observe the pseudopod with the semicolon. The pseudoclasses are "link", "visited" and "active". If you want to change link styles as we have done here, they must be declared in that order. The "link" pseudopod determines the style of a link on your page if it hasn't been visited. "Visited", therefore, declares what a link looks like after it has been visited. In this class a link will turn blue after it has been clicked. The "active" pseudopod isn't very noticeable. You can really only activate it if you have clicked on a link but clicked off of it. So, try pressing down on the mouse over a link and release outside of the link. There is one more pseudopod for links we will go over below: "hover." But first, here's a picture of the web as the first link is being clicked:
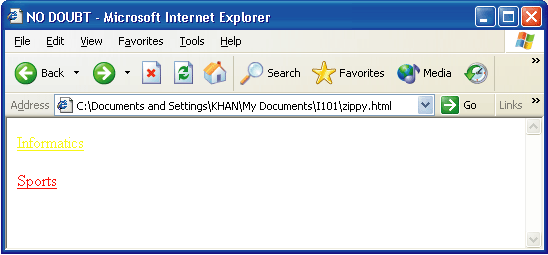
Notice we've made it so it's yellow during the click. Now we'll create a page where the links aren't underlined, but automatically become capital when your mouse is over them. Again, the order of these pseudopods are important - make sure you follow the order displayed or the effects other than link might not work.
Create this web page:
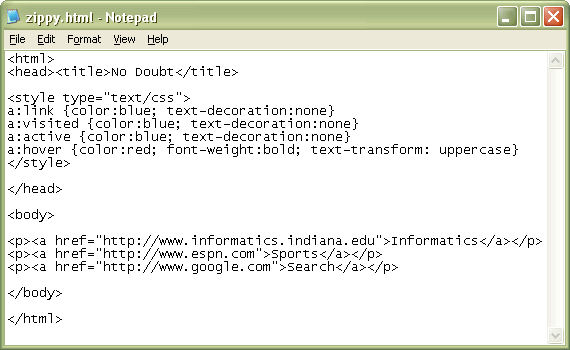
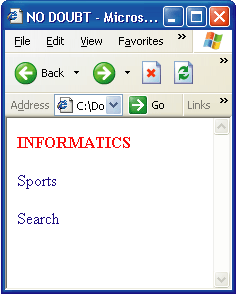
So, we have added the "hover" psuedopod. As you probably have noticed, this changes what a link looks like when you mouse over it. We have controlled the style of these links using two attributes. Text-decoration has the following values: none, underline, overline, linethrough, and blink. Text-transform has values uppercase, lowercase, capitalize, and none. Here's a screen shot of the mouse moving over the first link:
Your task is to modify the current web page so that the following displays:
- Links are capitalized.
- When the mouse hovers over it, the link is put to lowercase, red and bold on a white background.
- An active site is white text on black background.
- Nothing is ever underlined
Also, turn in this HTML file.
If you would like more practice with CSS, you can check out the following links:
- The W3Schools.com CSS tutorial
- Matt's CSS Resource page
This resource page has links to examples, online tutorials, books, and a classroom powerpoint on CSS.
5 CSS in your Blog
Your final task is to change basic settings of your blog template. To do this:
- Login to Blogger.com and click on "settings" for your blog
- Go to the Template tab in your blog
- Comment the existing CSS code. (Commenting is a good programming practice so that you do not lose code which has already been written, and you explain your code to yourself and others for later use)
- To comment, you need to add /* before the line you want to comment, and add */ after the part you want to comment.
- For example, to comment padding: 0; in the following code
body {
margin: 0;
padding: 0;
font-family: Verdana, sans-serif;
font-size: small;
text-align: center;
color: #333;
background: #e0e0e0;
}
we write /*padding: 0;*/ - The code thus becomes
body {
margin: 0;
/*padding: 0;*/
font-family: Verdana, sans-serif;
font-size: small;
text-align: center;
color: #333;
background: #e0e0e0;
}
which will make the HTML reader ignore that line.
- Change some of the tag attributes in the style tags of your blog's template. e.g. font-size: small could be changed to font-size: large
- Make at least 3 distinct changes in your template. Style tags you may want to change are: the style for the body{}, or the style definitions for the a:link and a:hover tags, or the style definition of the blog's header. HINT: use the text search feature in your browser to find these tags: Edit/Find
- Copy your changes along with the commented tags to a text file named changedtemplate.txt. In the first line of this file, describe (using comments) where in the template have you made changes (i.e. list the tags you altered)
- Upload this text file to Lab 3 under Assignments on Oncourse
Do not forget to upload all the files to Oncourse (on the assignments section, lab 3 folder) - check the deliverables again.
That's it! You are done with lab 3.

